
So you want to resize a photo and you own a Mac. The process is really simple and you only need the software that came on your machine. (For instructions on how to resize a photo on a PC this article is for you.)
To start, simply find the photo you wish to resize using the Mac’s Finder (the little happy face you use to find files), and click to open it. Mac automatically opens photos in its Preview software. Presuming you still want a copy of the image at the original size, the first thing you are going to do is SAVE AS and rename the file.
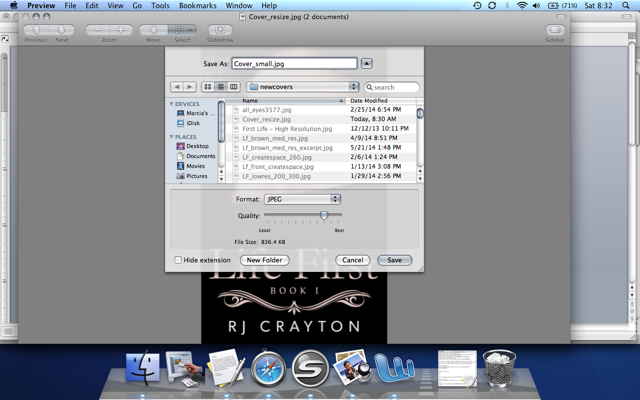
For the purpose of writing this tutorial, I used my cover, and chose to rename it, Cover_small. If you’ll notice in the screenshot above, it shows the file size at the bottom section of the SAVE AS pop-up box. You can actually shrink the file size right here. Simply slide that “Quality” bar to the left (toward least) and the file size will start to shrink (slide it to the right and it grows; but we’re not trying to grow your file size here).
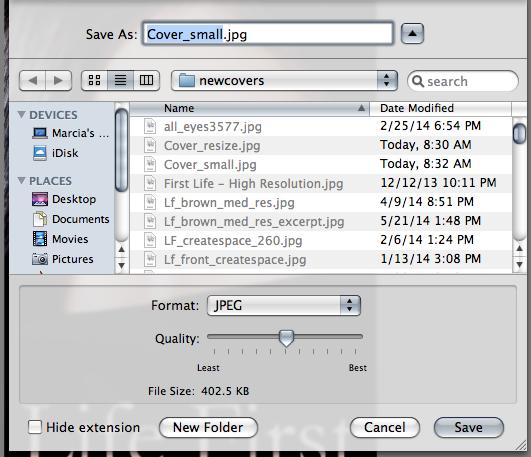
So, in this screenshot, I’ve slid the “Quality” arrow to the midway point and my file size has dropped from 836 kb to 402.5 kb. If I slide it all the way to the left, the size drops to 153.7 kb. If you’re comfortable with the size drop provided in the SAVE AS bar, you can save the file and be done. If you want a little more control or have exact dimensions your image needs to fit, do not do any resizing using the SAVE AS “Quality” bar. Simply save the file as the new name, so you can work on the image.
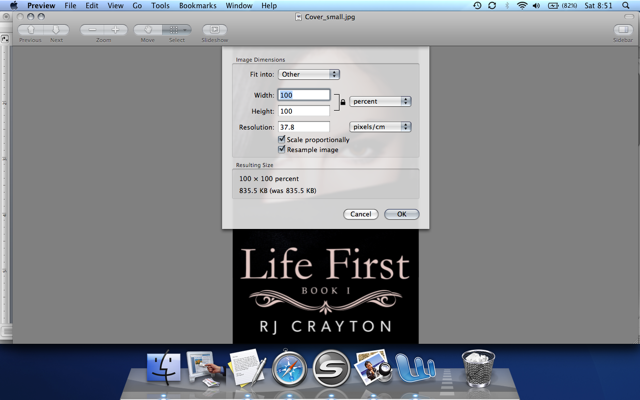
Once your image is saved under the new name, go the Tools menu and select Adjust Size. A window pops up that shows choices for Fit Into, Width, Height, and Resolution. Two boxes beneath that are automatically checked: Scale Proportionally and Resample Image. Leave those checked as they keep your image proportional when you resize it. The bottom portion of this box is an area that says, Resulting Size. That’s the area that lets you know what size your final image will be.
If you have a preset standard size you want your photo, use the Fit Into drop down menu. The default is set at Other. If you drop down the menu, you can pick from standard photo sizes. Picking 320×240 drops the file size to 15 kb (you’ll see this in the Resulting Size area); Picking 800×600 drops the file size to 62 kb.
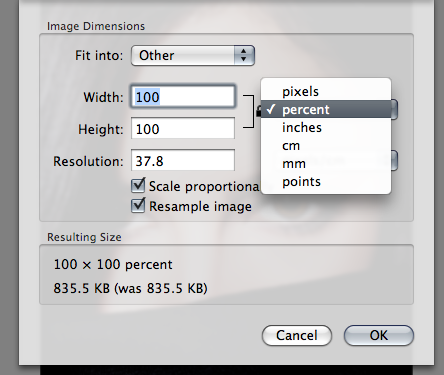
If you don’t want any of those sizes, select cancel at the bottom. Select Adjust Image again from the Tools menu and go straight to the Height/Width boxes. Directly to the right of those is a drop-down menu that shows the ways you can adjust the size: by percent, pixels, inches, centimeters, or millimeters. As I’m generally resizing my images so they’re smaller in bytes, I use the percent option.
My image is currently 835.5 kb. For this tutorial, I’d like to shrink it to 75 kb. So, quick math says that’s about 10 percent of the current size. So, I go to my Width section and replace 100 percent with 10 (because it’s set to scale proportionally, when I change the width, the height box automatically changes to 10 percent). Unfortunately, when I look down at the Resulting Size section, I see that the new image size will be 15.7 kb if I press OK and save. That’s smaller than what I want. So, I go back and change the percentage until I get the byte level I’d like (which turns out to be 27 percent — and please don’t ask me why; I don’t know). If you want to know how many pixels this will make your image, simply go to the drop down menu next to the Height/Width section and drop it to pixels. This won’t change anything you’ve done; it just offers you the same information expressed in pixels. The dimensions are 422 by 675 pixels. Click OK when the picture is the size you want and save the file. You have your newly resized image.
Thanks, RJ.
I’ve been resizing pics with Preview for years, but I never looked at all the options like that.
Learn something new every day 🙂
Yeah, it’s funny how you can be doing the same thing as someone else, but in a different way. Glad you learned somehting new.