![]() Making a book cover in Microsoft Publisher is extremely easy. If you don’t have MS Publisher, I’m sorry, I don’t really know any comparable alternatives in freeware or on Macs. (If you know of one, please feel free to let us know, and if you’d like to write a guest post about it – even better!) I’ve been using Publisher for a ridiculously long time, and that’s what works for me.
Making a book cover in Microsoft Publisher is extremely easy. If you don’t have MS Publisher, I’m sorry, I don’t really know any comparable alternatives in freeware or on Macs. (If you know of one, please feel free to let us know, and if you’d like to write a guest post about it – even better!) I’ve been using Publisher for a ridiculously long time, and that’s what works for me.
There are so many options in Publisher, I could never talk about all of them in this article. Nor do I probably know how to use all of them. I’m a simple person – and keeping it simple works for me. I’m using MS Office 2010. If you are using a different version, some of this will look weird to you, but the basics remain the same.
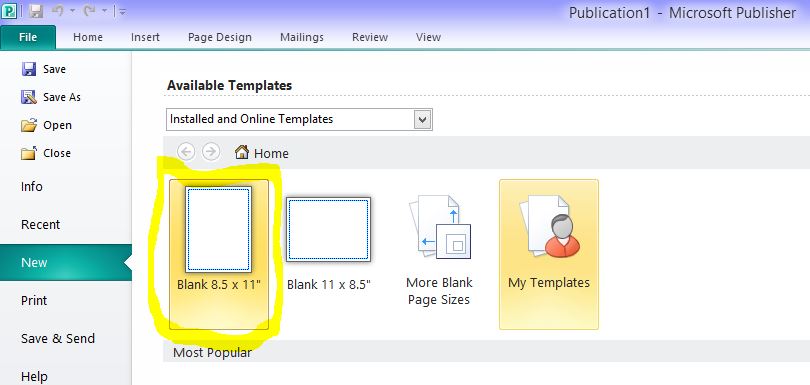
Open Publisher. Select blank (portrait mode) from the options under New.
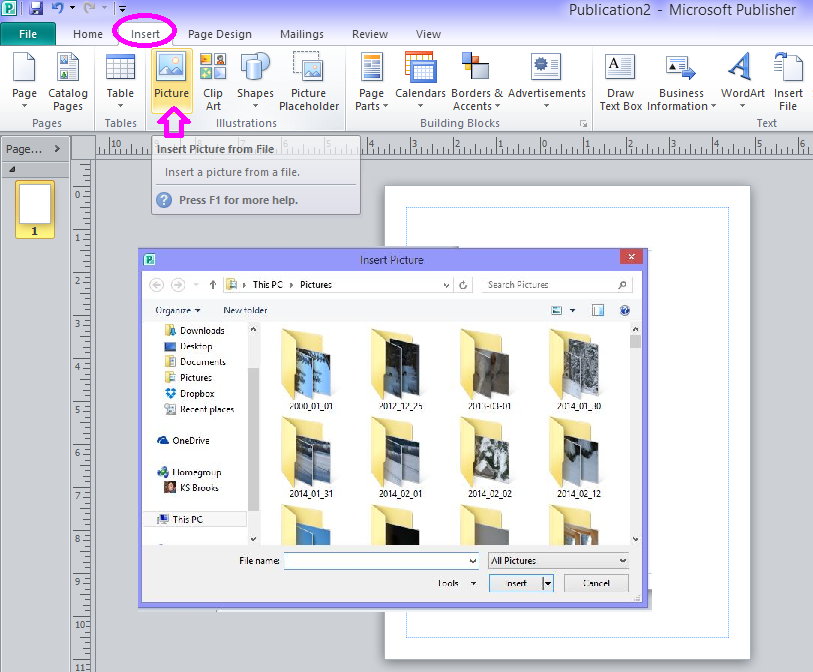
Now you’re in. Do you have a photo you’d like to use for your cover? Let’s go ahead and grab one. Click on the “Insert” tab at the top of your screen, then click “Picture.” That will open up a screen, of course, where you can select which picture you want. Find the one you want, then click “Insert.”
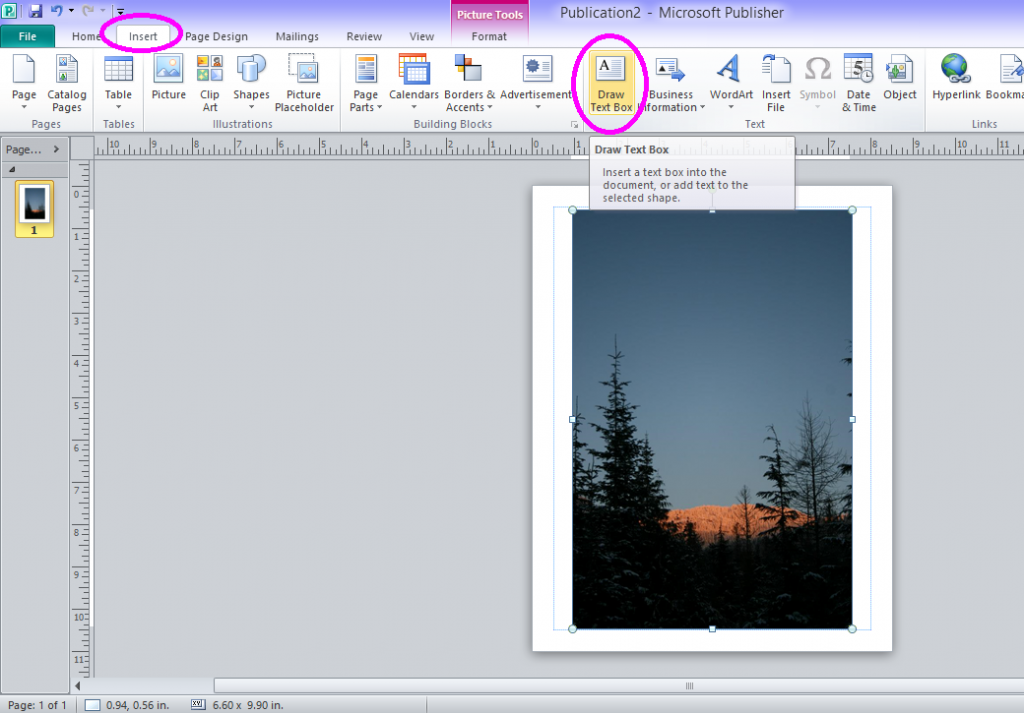
And boom! There’s your picture. Now it’s up to you what to do with the size. The default sheet size is 8.5 x 11. Personally, I leave it as is and just crop it down later. But if you want to change it, just click “Page Design” on the tool bar and below that there will be a “size” button. Or, you can enlarge the photo to fill the space. Up to you. Let’s see what we have now:
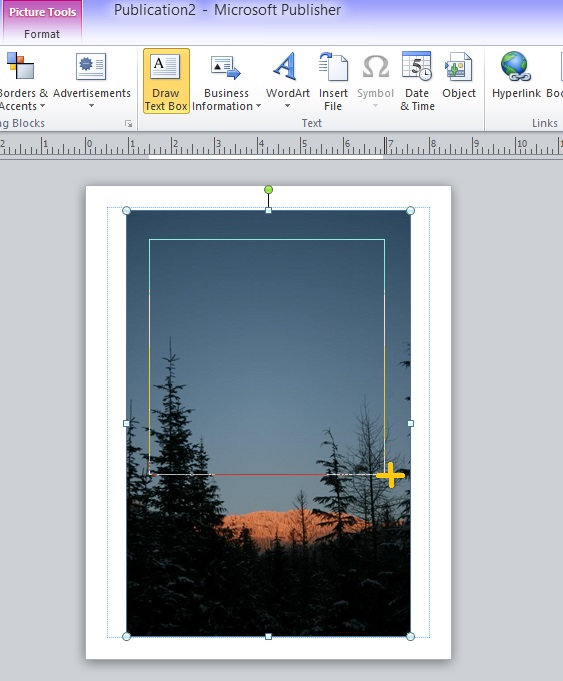
 Now that the photo is in, we can add text. In order to do that, we have to add a text box. Go over and click the “Insert” tab, and then click “Text Box.” When you hover your cursor over the picture, it will turn into a cross. Drag that to where you want your text to go. Not sure where you’re title should go? No matter what, make sure to avoid Title Envy, and this article can help.
Now, enter your text. Select the color, font size, font style, and more using the controls in the “Text Box Tools” section of the menu bar. Make sure all of your title text is highlighted when you choose these styles.
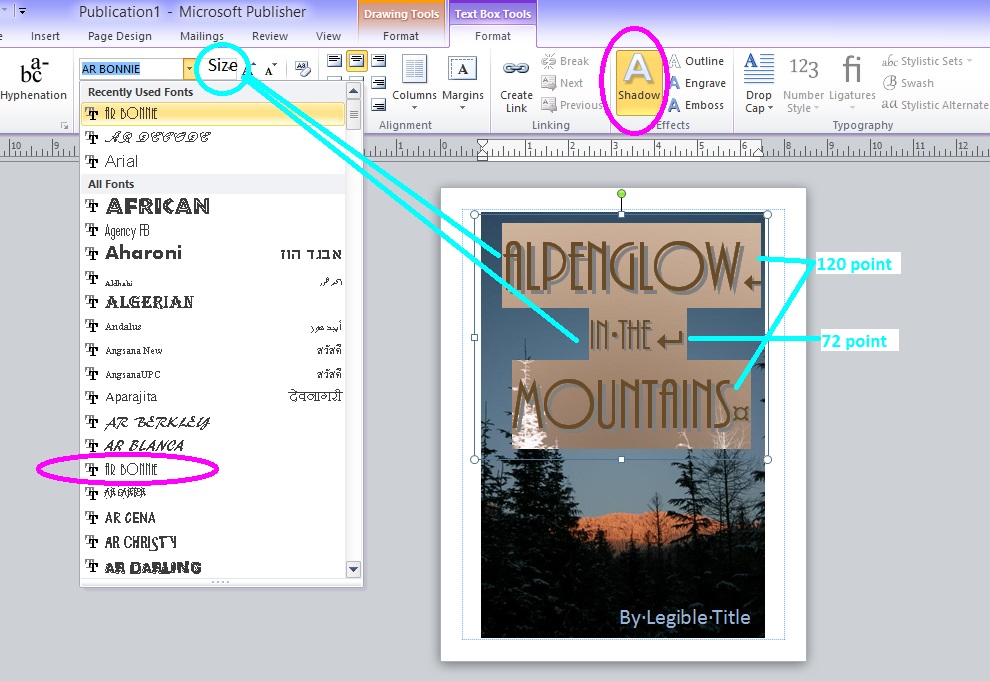
In the above screenshot, I chose AR Bonnie for the font, a light blue for the font color, the shadow effect to make the title “pop,” and two different sizes for the text. In order to do this, obviously you have to highlight the different lines and select different sizes. The AR Bonnie font only goes up to 72 in default sizes, but if you want bigger, just type in the size you want and hit “enter.” I decided to fill the frame by going with 120. Experiment until you find the size you want, but make sure the title is legible in thumbnail size and not in some crazy, swirly, illegible flowery font. Also, a plain font, with no effects, is going to look like you took a photo from home and slapped text on top of it. It will look homemade. It doesn’t need to.
For the author name, just draw another text box and repeat – use a different font, color, etc. Experiment until you get what you like. Now, you should save this file as a publisher file – a .pub. You will also need to save it as a .jpg. Dimensions vary for the different eBook publishers. For Kindle on Amazon (KDP), their instructions say:
Requirements for the size of your cover art have an ideal height/width ratio of 1.6, this means:
• A minimum of 625 pixels on the shortest side and 1000 pixels on the longest side
• For best quality, your image would be 2820 pixels on the shortest side and 4500 pixels on the longest side
On Smashwords: Upload a JPEG or PNG file. Image should be at least 1,400 pixels wide with a height greater than width.
Keeping those guidelines in mind, we’re going to save this as a 300 dpi image – that way there will be enough pixels to meet the requirements of both these sites. It looks a lot more complicated than it is; just follow the steps below:
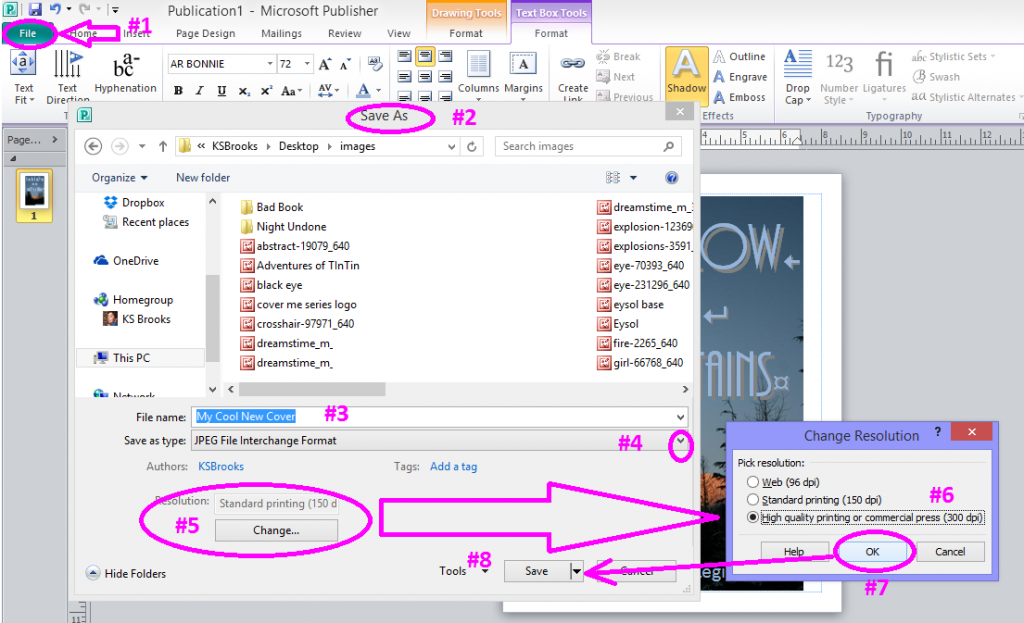
- Click File
- Save As
- Type in your file name
- In “Save as Type” either enter a “J” (which will autofill JPG) or click the dropdown arrow and select JPG
- A little section called “Resolution” will open – click “Change
- A new window will open, click the circle in front of “300 dpi”
- Click OK
- Click Save
Now you can open that jpg with the software package of your choice – I use Microsoft Office 2010 (Picture Manager) to trim and resize my book’s cover. Need a tutorial for that? We have one right here: How to resize a picture.
That should get you started. Have fun, enjoy, and make a spiffy book cover. Again, if there’s a different program you like to use, let us know about it below, and let us know if you’d like to write a guest post about it. Happy designing!

Thanks for the info. However, I am concerned you don’t address the matter of using the fonts from your computer to publish.
There are sites where you can chose fonts and get license to use, sometimes for free.
Hi Olivia, thanks for your comment. This article is just a beginner’s guide to making a cover using Publisher. We have had an article about how to download and install a font. You may find that here: https://indiesunlimited.com/2014/02/11/how-to-download-and-install-fonts/
I’ve used Ribbet.com to make book covers, since I have a Mac and don’t have MS Publisher. Now I wish I did, although I’ve had a lot of fun playing around with Ribbet.
Cool. Thanks for letting us know, Helen. I’ll have to check out Ribbet.
Publisher has been my goto for book covers. I am still trying to figure out how to make print covers with it.
I’m pretty sure I use it the “long way around” to make print covers, but I’ll be doing a follow-up post about that soon. Thanks, Jon.
Great information, Kat – thank you! I have Microsoft Publisher and had no idea what to do with it. Now I have to go play around with it. 🙂
That is something I will have to check into and see about purchasing. No it doesn’t mean I will stop buying artwork for covers but I can play around with it a bit more too. Thank you for the great info!
I have version 2003 and I can’t wait to start playing with it. Thanks, Kat, I never thought to give it a try. Can’t wait for your next tutorial.
You’re welcome, Dale. Thanks for your comment. 🙂
Thanks, Kat.
I love publisher. Been using for years, first to make webpages, then brochures for real estate agents, and now my bookmarkers and covers. I definitely am waiting for your turorial on how to make one for print. Thanks, Kat.