A few weeks ago K.S Brooks showed you how to take and use screen captures. Today, I would like to show you how to use a very useful free tool which is a programme that is part of Windows Vista, Windows 7, and Windows 8. It allows you to take specific shots of your screen. It is ideal for tutorials (ahem!) and for making your blog or website look professional. So, let’s get those scissors and get snipping.
To start the Snipping Tool follow these steps:
1. Click on the Start button to open your Start Menu.
2. Next click on the All Programs menu option.
3. Then click on the Accessories group.
4. Last, but not least, click on the Snipping Tool icon which looks like this:
![]() If you are running Windows 8, you can just search for Snipping Tool at the Windows 8 Start Screen.
If you are running Windows 8, you can just search for Snipping Tool at the Windows 8 Start Screen.
The snipping tool should now be started and you will see a screen similar to the one below. 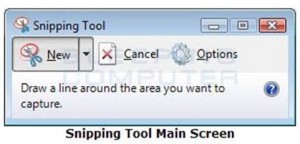 You can try four different types of snip using this tool. Just click on the small down arrow menu next to the New button as shown by the arrow in the image.
 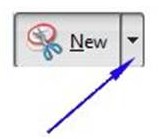 Now you can try one of the following:
Free-form Snip: This method allows you to draw a shape around your selection using a mouse or a stylus. Once the selection shape is drawn (make sure you close the shape so there are no open sides) the snip will be created and shown to you. See my fabulous effort below. I was never very good at circles:
 Rectangular Snip: This method simply allows you to create a rectangular selection around a portion of your screen and anything in that rectangle will be used to create the snip.
 Window Snip: When you use this method, the Snipping Tool will capture the contents of the entire window that you select.
 Full-screen Snip: This method will capture the entire screen on your computer.
Taking and saving snips with the Snipping Tool
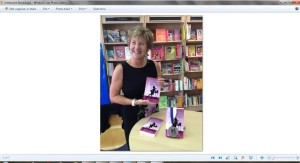
So, let us assume that you want to create a jpeg to put in a post. Go to your website or photos, choose the page or the photo you want to use, then open the Snipping Tool as explained above. I chose the picture below to put in a post I am writing about book launches.
 Once the program is opened, select the Rectangular Snip type by clicking on the down arrow next to the New button and selecting Rectangular Snip. Once the Rectangular Snip option is selected, click on the picture and drag a rectangular selection around the area you want to use. Once the selection is made, release the left mouse button and the rectangular region will now be sent to the snipping tool where you will see a box a bit like the one below. I dragged it around my face and book to get this picture:
 You can now save it as an image or put some text/drawings on it by clicking on the Tools menu and then select the Pen you would like to draw with or choose the picture of the pen which you can see on the bar at the top of the snipped picture. You can customize the pen by clicking on the dropdown arrow next to the pen icon. Choose the Customize option and you will be given a choice of pen tips and colours.
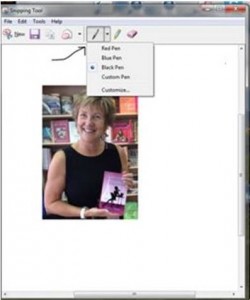 You can now write a relevant message or draw on your picture:
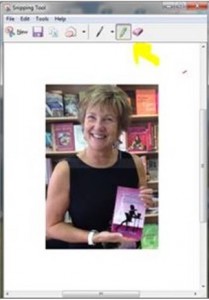
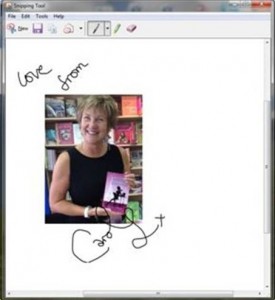 If you want to highlight certain parts of the picture, click on the Tools menu again and select Highlighter, or choose from the icons on the tool bar as arrowed in the picture below. If you make a mess, rub out mistakes by clicking on the eraser icon or clicking on Tools and selecting Eraser.
 Once you are satisfied with your snipped picture you can send it in an email as an embedded image or attachment by clicking on the mail icon
  or by clicking on the File menu and then selecting Send To. You can also save the snip as a file on your computer by clicking on the File menu and then selecting Save As. For pictures I suggest you always save your snip as a JPG.
 You should now have made your first snip. You can send your snips to your friends and family or embed them in web sites like this! It’s easy. It’s free and it is rather addictive. Since I discovered snipping, writing tutorials has become a lot of fun. Happy snipping!

I had that with my Machintosh II in the ’80s. Glad it made it finally to Windows.
Sorry, eclectic computer guy here, but couldn’t resist. 😀
Funny man! Your comment made me smile. I
OMGoodness! You are a star! I never knew I had this on my laptop, and have needed it so often. Thank you, Carol.
It’s a little gem of a tool, Glynis. If you have any difficulties using it, just let me know and I’ll see what I can do to help.
How do we use it on a MAC? So many clever techie people on this site! Thanks for detailed sharing.mj
Hi Ester. I haven’t got a MAC so I don’t know, but Massimo (above) might be able to direct you. I’ll check up and see if I can find out.
Great tutorial, Carol. I had no clue this was available. I was still operating back in the days Windows 3.x where I’d have to take a screen shot and manipulate with other software from there. This is going to be a big time saver.
I was d oing the same as you, Al. So glad I have helped simplify life. The snipping tool has been such a help to me. Have fun!
Wow, Carol, this is awesome, much easier than screen shots. I’ve never even looked at my “Accessories” folder. Thank you so much.
Sometimes the simple things in life, really are the best, Jim! This is easy-peasy to use. Look forward to seeing your snips!
I must echo the other comments here, Carol – I had no idea about this (nothing new there, to be fair). Thanks for the new toy – er, tool to use 🙂
Thanks Chris. I sort of stubled across it on a day when i really should have been doing something else and got rather excited about it. I hope you enjoy fiddling with your new tool. (Ooh matron!)
Thank you, Carol! I learned about the Snipping Tool in training when my day job upgraded our operating system last year (FINALLY). It is absolutely my 100% most favorite thing about Windows 7. I use it All. The. Time. (It’s especially fabulous because I could never remember the keystrokes to get a screen shot….)
I agree, Lynne. I love it and couldn’t do my tutorials without it. Also, I get to make really silly photos and post them on Facebook!
Great! I’ve been using the Prt Scr key and manipulating the image in my photo program.
Here’s a way to assign a keyboard shortcut to the program. Instead of clicking on the Snipping Tool icon, Right-Click on it instead and choose Properties, Click on the “Shortcut key” window and type the keyboard combination you want to use (I use Ctrl+Shift+Alt+S). Click OK, and now you can call up the program faster.
Thank you very much indeed. I shall do that immediately. Time is precious and all that…