 [NOTE: this is a repeat of a previously published tutorial by IU Special Agent Carol Wyer. She is currently away on secret assignment, teaching homeless dolphins to dance, or possibly something else. I’m a little fuzzy on the details. I have it written down here somewhere. Please also note Animoto has added some new templates and features. Below is a video K.S. Brooks made just this week using one of the new templates.]
I have been researching book trailer videos for weeks for my post next month when I discuss whether or not we should employ experts to produce book trailer videos. I have watched so many trailers that I have started buying popcorn to eat while I browse them all. Some are brilliant. Sad to say, mine is not in the ‘brilliant’ category and I have spent hours fooling about with Windows trying to make a reasonable video.
Imagine then my pleasure when I stumbled across www.animoto.com. I am still a bit of a Luddite when it comes to technological mysteries but Animoto is very easy to use. Now, remember I am a ‘numpty’ and I am also very old, so be patient as I attempt to explain how to use this great site.
First log on to www.animoto.com. You can join the site through your Facebook account which is what I did. You are presented with the option of paying for lengthy videos. Ignore that bit for the moment. You can have as many free thirty second videos as you want, it seems.
Thirty seconds is not a lot so you need to be prepared for your video. I suggest you have three to four max photos which you feel will help sell your novel and maybe two to three frames of words.

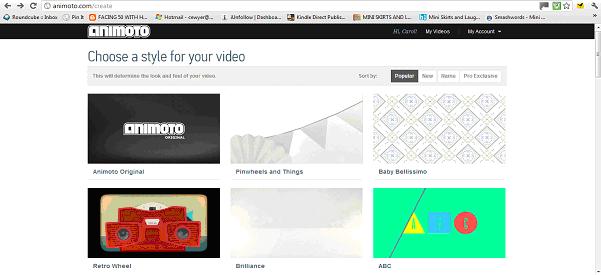
First you must choose the style of your video. You can click onto each choice and watch it to decide which one you favour. There is something for everyone. I chose the Retro Wheel – only because I used to own one of these and it sort of went with the feeling of fun I wanted to convey in my video.
You are then given a blank screen with four choices on the left hand side. They are pretty self explanatory. You can add pictures, music, and text or change the style of the whole video for a different one. It couldn’t be simpler. If you upload a photo or picture from your computer it places it onto the blank ‘editing board’ for you. Upload your photos or pictures by clicking on the ‘Add Pics & Vids’ button.
If you want to add text click on the ‘Add Text’ box.

You only get 22 characters worth of text in the Header box and 30 characters in the bottom so don’t put too much. This will then also be displayed on your ‘editing board’.
 If you wish to edit any of the small boxes on your editing board click on the bottom left corner of the box you want to change and you can make any alterations. If you want to put your boxes or ‘scenes’ into a different order, click and drag them to where you want to position them. If you wish to discard one, click and drag it to below the editing board where you can then delete it by clicking on the dustbin button on the right hand side.
The top left hand grey counter on your editing board alerts you to how much time you have left on your video. It will also tell you when you have too many pictures or ‘scenes’ and have run out of seconds. If it can’t fit your last picture or text box in it will automatically throw it out for you.
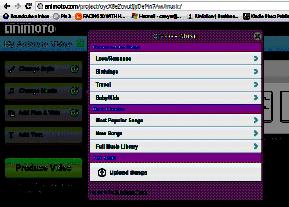
 Once you are happy with your scenes you will want to choose some appropriate music. There is a decent choice for your video. By clicking on ‘Change Music’ you will be offered a variety of styles to go with your video. Having chosen ‘Birthdays’ or ‘Travel’ etc. You will be offered further options, all of which you can listen to before choosing the one that best suits your video. You can even upload your own music if you prefer.
When you are happy with your attempt and are ready to see the version you have created, press the large green button on the left hand side marked ‘Produce Video’. It will take about thirty seconds to produce a preview of your video to watch. If you are not happy with it then press the ‘Continue Editing’ grey button underneath it and you will be taken back to the editing process. If you like what you see you will be able to produce the video by pressing the Produce button – a professional video lasting thirty seconds is then yours.
Just so you can see what I managed in less than half an hour, here is a link to my first video:
http://animoto.com/play/Zj6kLX0pxj8t6kpm5upijQ
It is incredibly addictive and there are advanced features on it that I haven’t discussed here. Just play about and see what you come up with. It has its limitations but it is a terrific start for a novice who wants a trailer to support their work. More about book trailers later this month. In the meantime have some fun with Animoto and let us know how you get on.
* * * * *


Nice, Carol.
Here’s my attempt with Animoto: http://www.youtube.com/watch?v=ty6oCzWx-o4
PS – the second link doesn’t show
Thanks Massimo. I’ve removed the broken link.
Very cool video Massimo. Sorry about the link. I think Animoto aliens ate my video. Thanks Stephen for removing it.
Great info. Thanks Carol.
You’re welcome Phillip. It is very easy to use and with the new templates, even better.