
Here at IU, we ask people not to send photos over 500kb. We’re all volunteers, and we have small, free email accounts. Therefore, large attachments cause a problem. If you’ve ever received a failure message from us stating “mailbox full” – that’s because someone sent us a large attachment which filled our mailbox to capacity. Naughty author!
We’ve run a couple of articles on this: Tutorial: Resizing Pictures and How to Resize a Photo – Mac Edition. If you don’t have the software programs mentioned in those tutorials, here’s an easy way to make an image smaller when you need to email it to someone. (In fact, you can even use this to email images to yourself if you need to resize it for something you’re doing.) It’s super easy, too.
Go to the directory where the image you want to resize is located. If you mouse over the photo, it should tell you how big it is. Then you know if you need to resize it. The photo below:
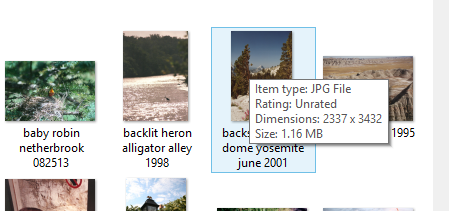
Is 1.16 mb and therefore needs to be resized. Right click on the image you want to make smaller.
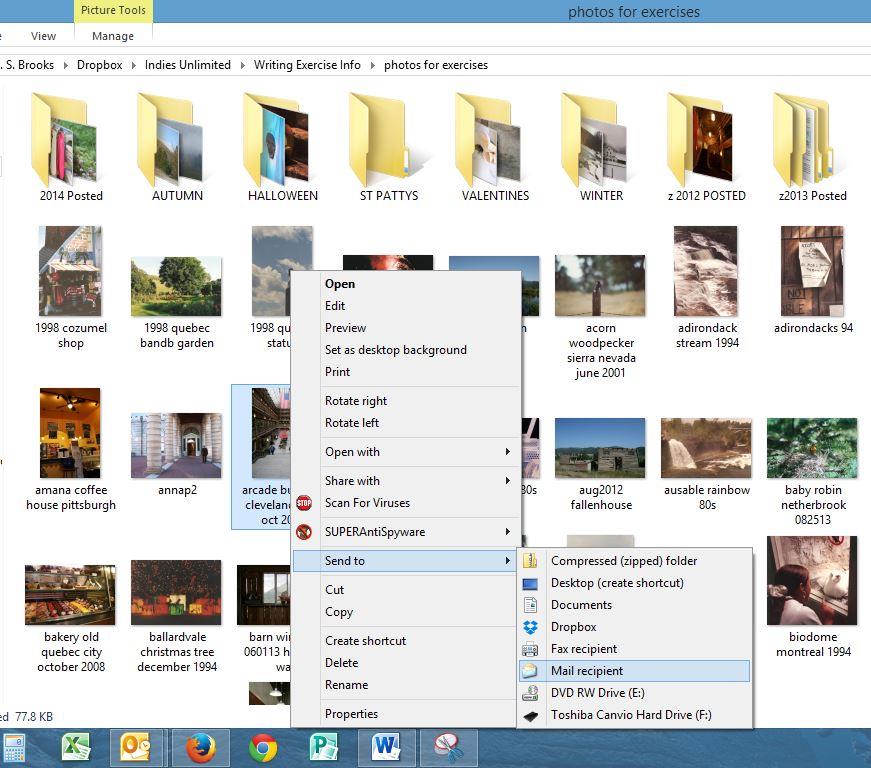
Then click Send to and then Mail recipient, as above.
A new screen should pop up. As you can see, it automatically selected Medium, resizing the photo to 230kb: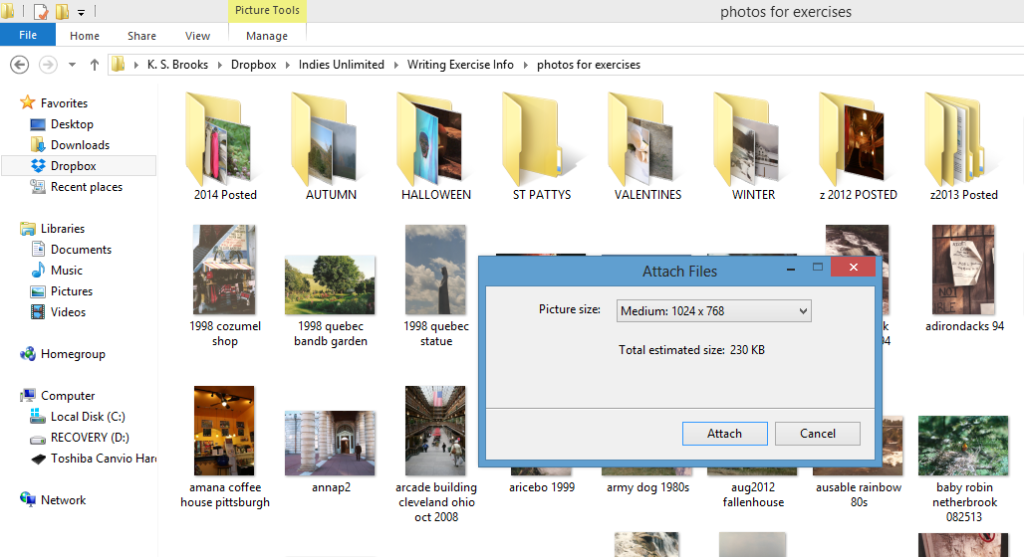 But you can make it bigger or smaller than that by clicking on the dropdown arrow next to Picture size: Medium…
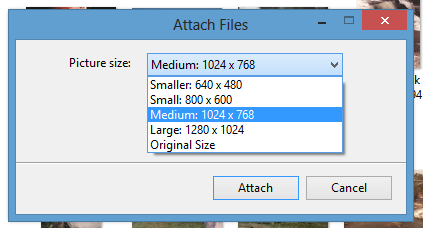
Unfortunately, it won’t tell you what the file size is until you click it. So, let’s choose Small:800×600 to see what it gives us:
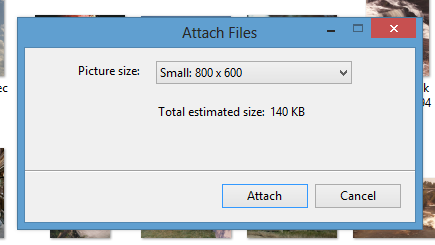
This setting reduces the photo size down to 140kb. If you want smaller, click the dropdown arrow again and select Smaller from the sizes.
Then click attach and it will open a new email for you. You can then send it to whomever you want, including yourself. Easy, eh?

Brilliant lifehack! Thanks, Kat!
You’re welcome! 🙂
What a great tip. I just tried it and will include it in the Jan/Feb issue of Writers Tricks of the Trade eZine with attribution. That was so easy.
Sweet. Thanks! 🙂
Oooh, thanks, Kat, that’s so useful.