 So you’ve finished your magnum opus and want to try your hand at uploading to KDP (the Kindle Direct Publishing platform). Congratulations! Except, the upload instructions you’ve managed to find are for text only and your manuscript has both text and images. Or, you’ve found the ‘Zon’s instructions, but try as you might, the images aren’t showing up in the preview.
I’m here to help
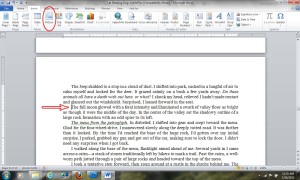
First of all, you need to make sure your images have been inserted into your .doc rather than cut and pasted. First, open your manuscript in Word. Place your cursor where you want the image to go in the document. Next, click Insert (at the top of the page), then click on Picture and choose the image you want to insert. Click Insert.
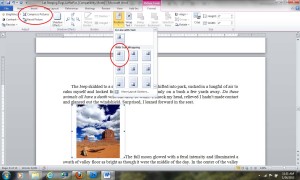
Once it’s where you want it, click on the image itself and go to Picture Tools/Format at the top of the page(or you can right click on the picture). Click on Compress Picture. This will make the image file smaller, which will make the .doc file more manageable. The actual visual size will remain the same. (If you have a lot of pictures, you can wait until they’re all inserted and when you compress, select “all images in document.”)
After that, you can click on Position and choose Text Wrapping if you’d like (although, currently the only device this will work on is the Kindle Fire, as you’ll see later). Compress all of your images in the manuscript, save it and close the document.
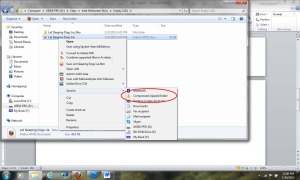
Next, create a separate, empty folder (name it something you’ll remember) into which you will save your document as a Web Page, Filtered (creating the empty folder is the part that isn’t clear in the ‘Zon’s instructions). Once you save it as a web page into this new folder, two files will be created: the .html file and a folder that contains the images. Right click on the .html file and click Send to Compressed (zipped) folder. This will create the folder you will upload to KDP. Drag and drop the image folder into the zipped folder, so it contains both the .html file and the images.
Now you can go to your bookshelf in your KDP account and add your new title. Fill out the book details and upload the cover. When you get to the part that asks you to upload your book file, choose the zipped folder you created. (Upload the whole folder at once, not the individual files.)
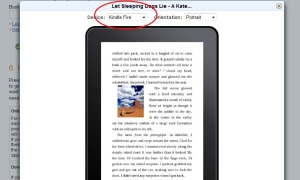
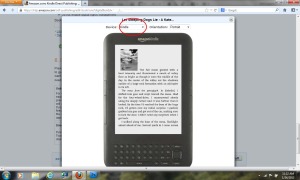
Preview the file in each of the platforms (iPad, iPhone, Kindle Fire, Kindle, etc.). It will look a little different in each. Here’s where you’ll see a difference between the Kindle Fire and the other devices if you positioned your images to have the text flow around them.
Kindle Fire:
And on Kindle:
Finish the steps and hit publish. Good luck!

Good info! Something I will use in the future. Thank you for the article.
You’re welcome, Dick! Thanks for stopping by 🙂
Thanks DV! I’m going to try to add some images soon and am glad I can skip the learning curve (thanks to you)!
You’re welcome, CM–it’s always a good thing to learn from other people’s hair-tearing experiences 🙂
Thanks, D.V.! People have asked about this, and I never know what to say because my books are all straight text. Now I know where to point them. 🙂
Yeah, me too. That’s why I found the info–I was teaching a class on self-publishing and had several non-fiction writers who needed the information. Glad I could be of help!
I have successfully uploaded .docx and .doc files that have images without having to create the zip file (my books tend to have mock news articles and photo journal entries). So long as you select ‘in line with text’ for the images, insert them and compress them, there should be no need to create the zip file 🙂
Oddly enough, any document I’ve uploaded with images in them even with the ‘inline with text’ selection have showed up without images. The only way I can get them to show up is by converting to a PRC or doing it with the zip file.
Same with me, Kat. So, if the first way doesn’t work, then you can try the other. Always good to have options.
I just went over this hurdle myself. Good to see how it SHOULD be done – but I found that uploading an ordinary Word.doc file (instead of the web-filtered htm file they tell you) ends up with photos displayed perfectly. It’s a little simpler than creating new zip files, but I’ll try the proper method next time. Thanks for the info!
LOL! Whatever works for you, Bev 🙂 I tried using an ordinary Word doc and it didn’t display properly. Then I tried the zip file. Once I did that, it worked perfectly.
I had such a nightmare trying to get my one image from my first book to where it would display on the Kindle. I ended up going through this same process, but as you mentioned, it’s not really clear on Amazon’s instructions. I’m bookmarking this article to prevent the same happening to me next time. Thanks!
I feel your pain, Brian. I was mystified as to why it wasn’t working for me until I found the ‘fix’. It’s relatively simple once you’ve done it. Thanks for stopping by!
Very helpful post, thanks!
You’re welcome 🙂
Great info DV. This comes at a great time as I am working on a project that will have some pictures and I wondered if they would turn out ok on all eReaders. Thank you.
Great article. Thanks.