 Remember when you were a kid, parading around in Mom’s high heels and boa? Remember how much fun it was? Well, you can recapture that magic by dressing up your blog.
(And if you had so much fun dressing up in Mom’s heels and boa that you’re still doing it? Way too much information, dude.)
Nearly every writing-related website and blog hop has its own widget these days. Usually it’s a button – a picture with a link embedded, so that when you click on the pic, you go to the website. On Blogger, you can add widgets (Blogger calls them gadgets) on your layout page. For a pre-made button, copy the code from the site you want to link to. Then go to your layout page on your blog. Click “Add a gadget” and scroll down the list to “HTML/Javascript.” In the pop-up window, give your widget a title if you want (you don’t have to), paste in the code, and click Save. Then preview your blog. If you don’t like the position of your new button on your blog page, you can go back to layout and click-and-drag it somewhere else until you’re happy. Click “Save arrangement” on the layout page. You’re all set.
Before IU had an official button, I made my own. I used Windows 7’s Snipping Tool to clip a picture of the IU logo from the IU Gear store, and then loaded it into one of Blogger’s gadgets – the one called “Image.” There’s a spot for a web address, so I copied IU’s URL from my browser bar, plugged it in, and hit Save. Poof, done.
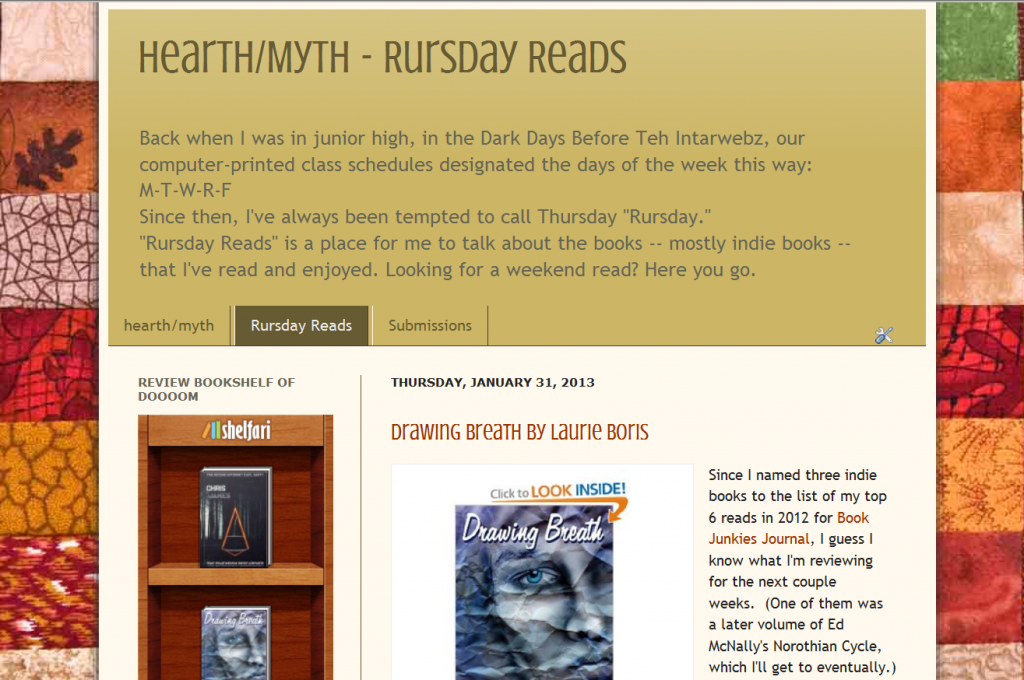
Some websites offer more complicated widgets. Shelfari, for instance, will put together a cool bookshelf for you. I’ve just started an offshoot of my main blog for book reviews, and I decided it would be fun to have a shelf of titles I’ve reviewed. Shelfari made it easy. Here’s how it works:
• Go to Shelfari.com. (Not on Shelfari? We’ve got directions here for setting yourself up.) On the right-hand side of your personal home page, down at the bottom, there’s a list of links. One of them says “Widgets.” Click that. You’ll go to a new page with a button that says, “Create widget.” Click that.
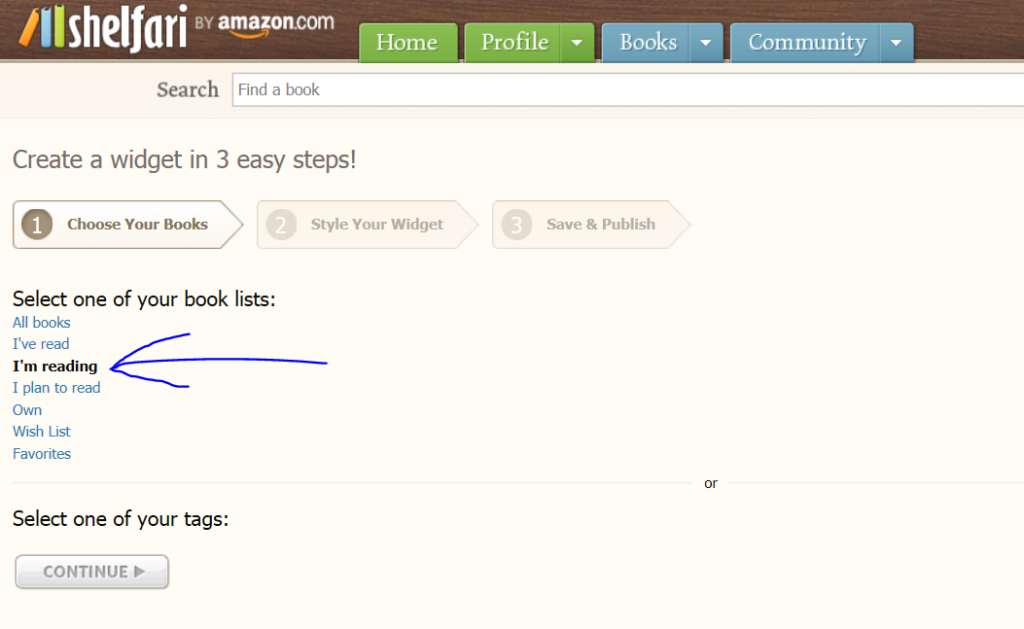
• Now the fun starts. First, choose your blogging platform; I clicked the orange B for Blogger. Next, pick which tag – in other words, which category of books – you’d like displayed on your shelf. I’ve already got a Shelfari widget that shows my own books on my main blog, so I picked “I’m reading” for this one since I didn’t have any books tagged with that yet. Click “Continue.”
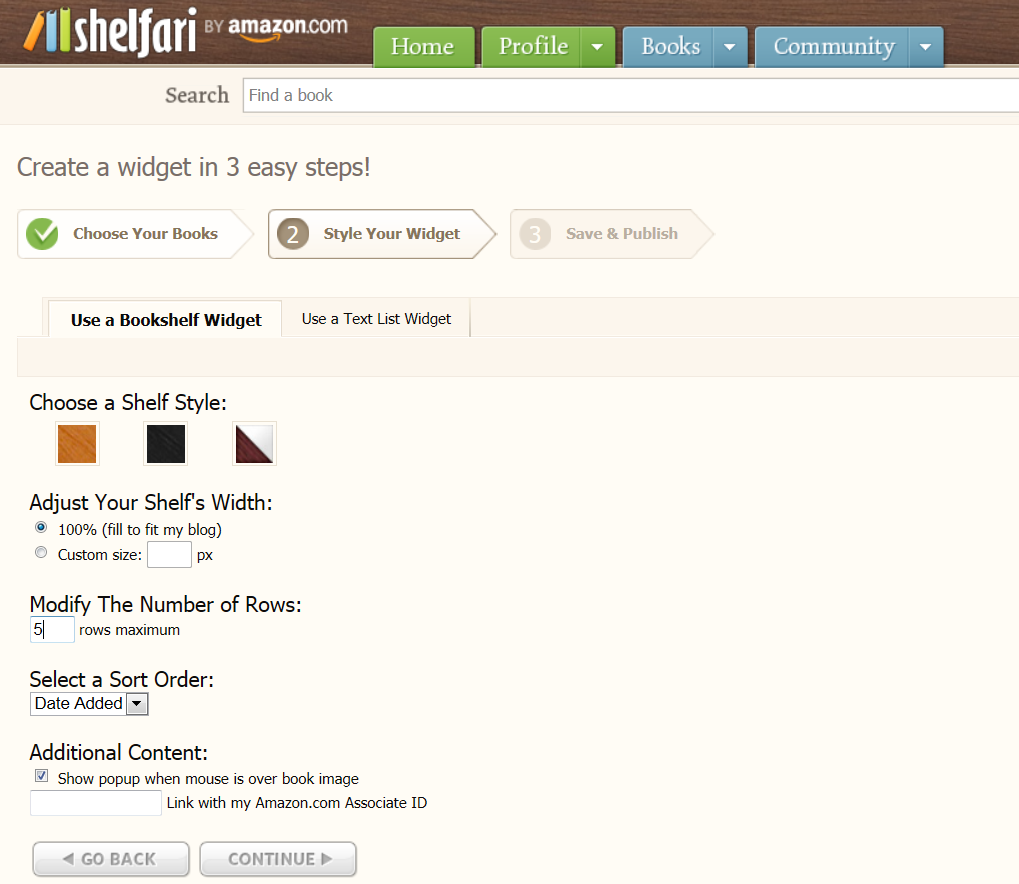
• Now, pick a shelf style that suits you. I’m going with the default, because I think it will complement my blog’s background nicely. You can also adjust how tall your shelf will be, and so on. Click “Continue.”
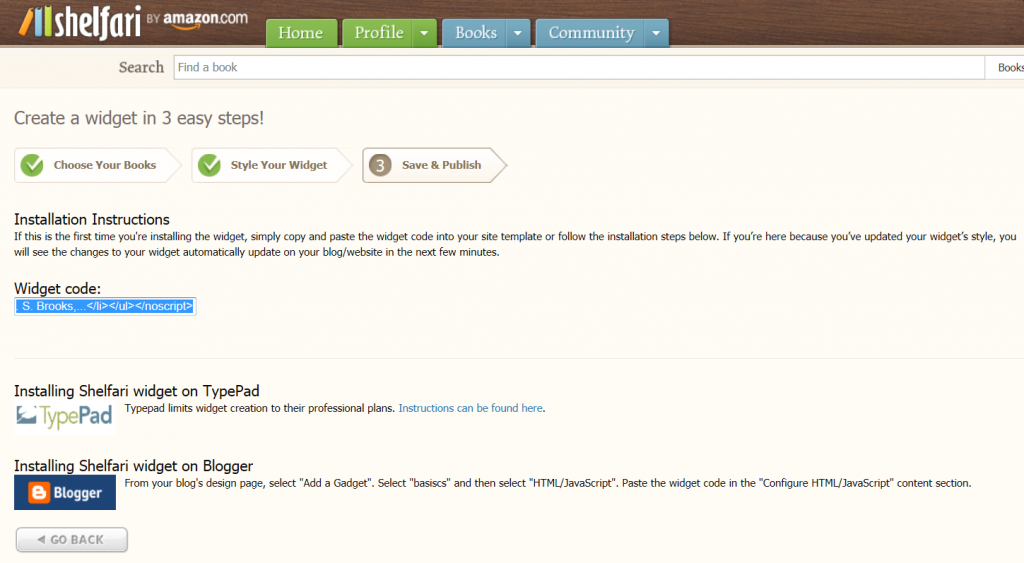
• Shazam! Shelfari has generated the code for your widget. Copy everything that’s in the box.
• Now it’s just like installing any other widget. On your Blogger layout page, click “add a gadget,” pick “HTML/Javascript,” paste in the code from Shelfari, and click Save. Now view your blog. Isn’t it pretty?
Blog dress-up is fun! Plus Mom won’t yell at you for getting lipstick on her boa.


Lynne, how can we get the widget code for other blogs? I have a Blogspot and would like to put the IU widget on mine.
Same-same. Blogger is the host, but my blog address is hearth-myth.blogspot.com. 😉
Kathy, I have a blogspot blog and I used the code that’s on the IU gear page and that worked fine. I did it so long ago, though, that I can’t remember how I did it. LOL
OK, I’ll have to go dig that up. Yeah, if I can remember how to do that too!
Here’s the link: https://indiesunlimited.com/iu-gear/ If you figure it out, please feel free to let us know how you did it. Sorry I don’t remember!
Please can somebody instigate an eighth day of the week so I can fit in doing all this fun stuff? You make it sound so do-able, Lynne!
An eighth day? Oh, Bev, if only! I’ve got a mental to-do list that you wouldn’t believe… 😉 Making a widget only takes a few minutes, though, and you don’t have to add them all at once.