Screen captures (also known as screen shots) come in handy for many reasons. You can use them to show someone when your computer is doing something funky, preserve book reviews in an image file, capture blog comments for legal reasons, provide instructions to someone, create print-outs of web-based stuff for promotional materials, and many other purposes.
While some things put up on the Internet are “forever,” some things aren’t. So I try to grab an image of any press I get and put that on my website. I include the link at the top so people can see where the story originated, but if that link becomes void it’s now literally preserved forever on my site. Here’s an example of a story run in a Vancouver-area online newspaper. The great thing about that is that you can trim out all the other “briefs” and just focus on yours. This, of course, is just one usage.
I recently received an email from LinkedIn telling me that I had one of the top 10% viewed profiles out of over 200 million members. Personally, I think everybody got that email, but here was a perfect opportunity to share something online – with a screen shot. The screen shot image serves as evidence that I’m not making this up.
So, I went to my email from LinkedIn. With that up on the screen, I simultaneously pressed the shift and prt sc (print screen) keys. This will vary from computer to computer, some older ones require the additional use of the ALT key, and some only require you to press the prt sc key. Note: you will only capture what’s showing on your screen, so make sure the target is positioned exactly how you want it. (Yes, you can scroll down, do multiple grabs and merge them together, but I’m old and lazy and don’t feel like explaining all that.)
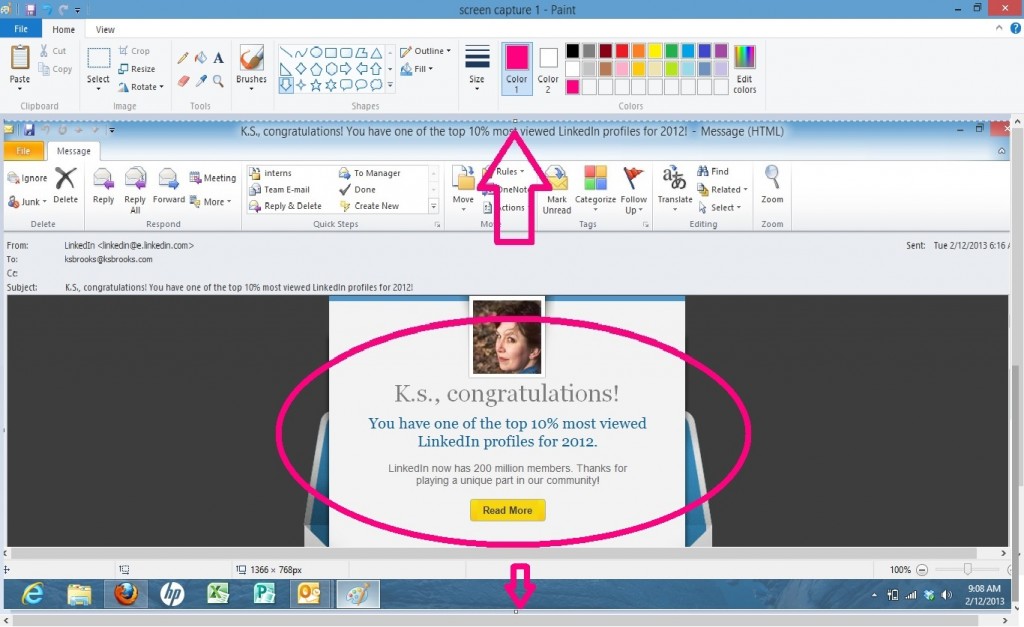
Now that you’ve captured your screen, you need to do something with it. My destination software of choice is Microsoft Paint, so launch that. Once it’s open, you can right-click with your mouse and select Paste, you can hit Ctrl and V simultaneously to paste, or you can select Edit from the toolbar and then click Paste. I personally find the quickest and easiest to be Ctrl and V. Now that you’ve pasted, your Paint screen will look like this. (I’m using Windows8 if it looks funny to you. This can also be done in all older versions of Paint.)
 It may look like there’s a lot going on in the screen above, but there’s not, really. The most important thing to note is all I want to “capture” is the information within the circle so I can post a nice little graphic on my Facebook page. (Even though I think it’s malarkey.) See the dotted line at the top and the little empty box at the bottom highlighted by the pink arrows? That means you can still drag your screen capture to crop out the “white space” you don’t want.
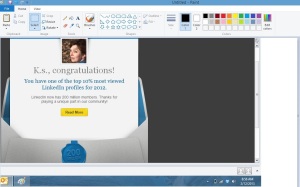
I’m going to “drag” my image to the left using my left-hand mouse button until I’ve trimmed off all that extra space and I’m flush with the edge of the envelope. I’m also going to drag it up until the email headers are gone and I’m flush with the top of my picture. Try to do the best you can with this, because once you save it, you won’t be able to trim it again this easily. See photo below.

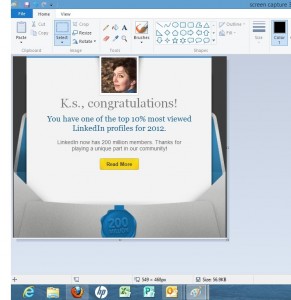
Now we’ve got to trim the bottom and the right-hand side. Remember the little empty box in the first picture? Well, there’s one on the right-hand margin as well. In older versions of Paint it’s a little blue dot and is almost impossible to see. You can find it dead center either vertically or horizontally. You’ll know when you’re directly over it because your mouse will change into arrows. So then hold down your left mouse key and drag that box/dot over until your image is trimmed to where you want it to be. See screen below.

Now you have to save it. When you click File / Save As you will get a bunch of choices. In older versions of Paint, the default will be bitmap (.bmp). In the new version, the default will be a portable network graphic (.png). In either case, I select .jpg. I’m expecting to hear some groans out there – but let me tell you, some websites – including Facebook – don’t yet recognize PNGs as readily as JPGs. Just sayin’, but you can choose the format that is right for you.
I prefer using Paint because I end up with a .jpg image that I can use anywhere – websites, social media, documents, etc. Sure, you can capture and paste directly into a Word Document, but you’re going to have to then use Word’s cropping tools and you won’t really be able to post the image anywhere else.
So, now I’ve got the pretty graphic at the top of the article and I’m going to go rub it in the faces of — oops, I mean SHARE it with — my peers and friends on Facebook. What will you use your first screen capture on?

This is great, Kat. I’m trying to do a screen capture but having problems. Does anyone have info on how to do it on a MAC? Thanks!
Sorry, no idea about Macs! Anybody?
Snipping tool? I’m doing a tutorial on that soon.
Yes ma’am, I do recall that! 🙂
Have a Mac also and have forgotten screenshot capture. I do recall that it was way easier than that described above. Sorry, Kat, I still love you. As I recall you push either one or two keys and get the screenshot as an image on your desktop and you can drag it anywhere. It’ll take some research to find it again, I use it so rarely, since I never get notified of accomplishments by Linked In or anyone else. 🙂
From an Apple expert I know: “You can do a command-shift 3 for a full screen capture or command-shift-4 to get a crosshair cursor to select a portion of the screen to capture. for either one a .png file is saved either to the desktop or your documents folder (depends on version of the OS as to which place). Add the control key to either combo and it is saved to the clipboard so you can save it other ways. There is also an included utility called “Grab” that will give you even more controls and options.”
Thanks so much Lynne! I’m off to try it now. I’ve been trying to do a screen capture for a couple of weeks with no success. Hope this works!
Thanks! I always forget the key sequence for a screen capture….
For Macs: Shift-command-3 to screen cap the whole page. Shift-command-4 to crop just what you want.
Thanks Laurie. I knew this group would know!
I had a need for this function recently, but tried without the shift key and it didn’t work. Now I know how to do it correctly. This is good information.
Thanks Kat.
You’re welcome, Rich! Glad you found it useful. 🙂
Thanks! I always forget too. Now I will file it so I can find it :). I shared along too.
Great! And thanks for sharing. 🙂
You know me…I use the snipping tool!
Hugely useful, Kat, thank you for sorting this out – another tool in the armory!
You’re welcome, Chris – my pleasure!
Wow… so many MAC users. Plain old PC here. Great post Kat.
Thank you, AC!
Great tutorial Kat,
I’ve used this process extensively but sometimes the “print screen” key doesn’t do the trick all by itself, I’ll have to try the “shift” Pr SCR method when I run into that problem.
I received the 10% thing from LI too and thought the same thing as you … until … one of my friends emailed me with the same graphic …. for Top 5%!!!! Oh well, at least we’re in the top 20 Million!